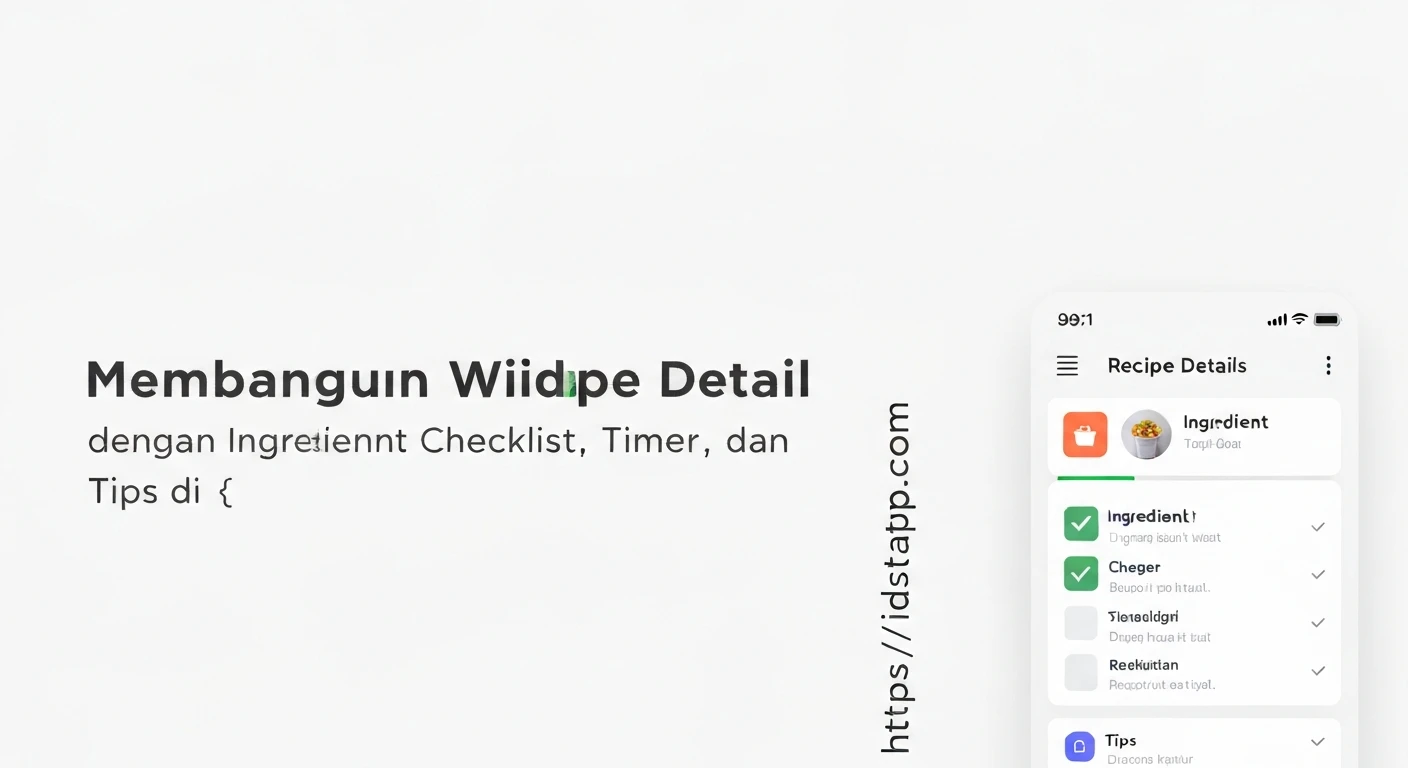

Building a Recipe Detail Widget with Ingredient Checklist, Timer, and Tips in Flutter
Creating an engaging and functional recipe application often requires more than just displaying static information. A truly useful recipe detail screen should offer interactive elements that guide the user through the cooking process. This article details how to build a comprehensive Flutter widget for recipe details, incorporating an ingredient checklist, a cooking timer, and helpful tips.
Understanding the Core Components
Our recipe detail widget will integrate three primary interactive components:
- Ingredient Checklist: Allows users to mark ingredients as they're gathered or used, providing a visual progress indicator.
- Cooking Timer: A practical tool for managing cooking durations directly within the app, complete with start, pause, and reset functionalities.
- Cooking Tips: A section to display helpful advice or tricks relevant to the recipe.
Recipe Data Model
First, let's define our data models for Recipe and Ingredient. These will hold the necessary information for our widgets.
class Ingredient {
  final String name;
  final String quantity;
  bool isChecked;

  Ingredient({required this.name, required this.quantity, this.isChecked = false});
}

class Recipe {
  final String title;
  final String description;
  final String imageUrl;
  final List<Ingredient> ingredients;
  final String instructions;
  final List<String> tips;
  final int cookingTimeMinutes; // For the timer

  Recipe({
    required this.title,
    required this.description,
    required this.imageUrl,
    required this.ingredients,
    required this.instructions,
    required this.tips,
    required this.cookingTimeMinutes,
  });
}

// Sample Data (for demonstration)
final sampleRecipe = Recipe(
  title: "Classic Margherita Pizza",
  description: "A simple yet delicious pizza originating from Naples, Italy.",
  imageUrl: "https://upload.wikimedia.org/wikipedia/commons/thumb/a/a3/Eq_livre_aproape_noi.jpg/800px-Eq_livre_aproape_noi.jpg", // Placeholder image
  ingredients: [
    Ingredient(name: "All-purpose flour", quantity: "250g"),
    Ingredient(name: "Warm water", quantity: "150ml"),
    Ingredient(name: "Dry yeast", quantity: "5g"),
    Ingredient(name: "Salt", quantity: "5g"),
    Ingredient(name: "Sugar", quantity: "pinch"),
    Ingredient(name: "Tomato sauce", quantity: "100g"),
    Ingredient(name: "Fresh mozzarella", quantity: "125g"),
    Ingredient(name: "Fresh basil leaves", quantity: "a few"),
    Ingredient(name: "Olive oil", quantity: "1 tbsp"),
  ],
  instructions: "1. Prepare dough. 2. Let it rise. 3. Roll out dough. 4. Add sauce and cheese. 5. Bake until golden. 6. Garnish with basil and oil.",
  tips: [
    "Use '00' flour for a more authentic Neapolitan crust.",
    "Don't overcrowd the pizza with toppings.",
    "Preheat your oven and pizza stone (if using) to the highest temperature possible.",
  ],
  cookingTimeMinutes: 15, // Example cooking time
);
Building the Ingredient Checklist
The ingredient checklist will be a stateful widget that allows users to toggle the isChecked property of each ingredient. We'll create a dedicated widget for each ingredient item.
IngredientChecklistItem Widget
This widget displays a single ingredient and a checkbox. It will call a callback function when its state changes.
import 'package:flutter/material.dart';
// Assume Recipe and Ingredient models are defined as above

class IngredientChecklistItem extends StatelessWidget {
  final Ingredient ingredient;
  final ValueChanged<bool?> onToggle;

  const IngredientChecklistItem({
    Key? key,
    required this.ingredient,
    required this.onToggle,
  }) : super(key: key);

  @override
  Widget build(BuildContext context) {
    return Card(
      margin: const EdgeInsets.symmetric(vertical: 4.0, horizontal: 8.0),
      child: Padding(
        padding: const EdgeInsets.symmetric(horizontal: 8.0, vertical: 4.0),
        child: Row(
          children: [
            Checkbox(
              value: ingredient.isChecked,
              onChanged: onToggle,
            ),
            Expanded(
              child: Text(
                "${ingredient.quantity} ${ingredient.name}",
                style: TextStyle(
                  decoration: ingredient.isChecked
                      ? TextDecoration.lineThrough
                      : TextDecoration.none,
                  color: ingredient.isChecked ? Colors.grey : Colors.black,
                ),
              ),
            ),
          ],
        ),
      ),
    );
  }
}
IngredientChecklist Widget
This widget manages the list of ingredients and their individual states. It will be a StatefulWidget to update the UI when an ingredient is checked/unchecked.
// Assume IngredientChecklistItem, Recipe and Ingredient models are defined as above

class IngredientChecklist extends StatefulWidget {
  final List<Ingredient> ingredients;

  const IngredientChecklist({Key? key, required this.ingredients}) : super(key: key);

  @override
  _IngredientChecklistState createState() => _IngredientChecklistState();
}

class _IngredientChecklistState extends State<IngredientChecklist> {
  @override
  Widget build(BuildContext context) {
    return Column(
      crossAxisAlignment: CrossAxisAlignment.start,
      children: [
        Padding(
          padding: const EdgeInsets.all(8.0),
          child: Text(
            "Ingredients:",
            style: Theme.of(context).textTheme.headline6,
          ),
        ),
        ListView.builder(
          shrinkWrap: true, // Important for nested ListViews/Columns
          physics: const NeverScrollableScrollPhysics(), // Disable internal scrolling
          itemCount: widget.ingredients.length,
          itemBuilder: (context, index) {
            final ingredient = widget.ingredients[index];
            return IngredientChecklistItem(
              ingredient: ingredient,
              onToggle: (bool? newValue) {
                setState(() {
                  ingredient.isChecked = newValue ?? false;
                });
              },
            );
          },
        ),
      ],
    );
  }
}
Implementing the Cooking Timer
The cooking timer requires state management to track the elapsed time, whether it's running, paused, or reset. We'll use a Timer from dart:async.
import 'package:flutter/material.dart';
import 'dart:async'; // For Timer

class CookingTimer extends StatefulWidget {
  final int initialDurationMinutes;

  const CookingTimer({Key? key, required this.initialDurationMinutes}) : super(key: key);

  @override
  _CookingTimerState createState() => _CookingTimerState();
}

class _CookingTimerState extends State<CookingTimer> {
  late Duration _duration;
  Timer? _timer;
  bool _isRunning = false;

  @override
  void initState() {
    super.initState();
    _duration = Duration(minutes: widget.initialDurationMinutes);
  }

  void _startTimer() {
    _timer = Timer.periodic(const Duration(seconds: 1), (timer) {
      if (!mounted) return; // Check if the widget is still in the tree
      setState(() {
        if (_duration.inSeconds > 0) {
          _duration = _duration - const Duration(seconds: 1);
        } else {
          _timer?.cancel();
          _isRunning = false;
          // Optionally, show a notification or play a sound
          ScaffoldMessenger.of(context).showSnackBar(
            const SnackBar(content: Text('Cooking time is up!')),
          );
        }
      });
    });
    setState(() {
      _isRunning = true;
    });
  }

  void _pauseTimer() {
    _timer?.cancel();
    setState(() {
      _isRunning = false;
    });
  }

  void _resetTimer() {
    _timer?.cancel();
    setState(() {
      _isRunning = false;
      _duration = Duration(minutes: widget.initialDurationMinutes);
    });
  }

  String _formatDuration(Duration duration) {
    String twoDigits(int n) => n.toString().padLeft(2, '0');
    final minutes = twoDigits(duration.inMinutes.remainder(60));
    final seconds = twoDigits(duration.inSeconds.remainder(60));
    return "$minutes:$seconds";
  }

  @override
  void dispose() {
    _timer?.cancel();
    super.dispose();
  }

  @override
  Widget build(BuildContext context) {
    return Card(
      margin: const EdgeInsets.all(8.0),
      child: Padding(
        padding: const EdgeInsets.all(16.0),
        child: Column(
          children: [
            Text(
              "Cooking Timer",
              style: Theme.of(context).textTheme.headline6,
            ),
            const SizedBox(height: 10),
            Text(
              _formatDuration(_duration),
              style: Theme.of(context).textTheme.headline3?.copyWith(
                color: _duration.inSeconds > 0 ? Colors.black : Colors.red,
              ),
            ),
            const SizedBox(height: 20),
            Row(
              mainAxisAlignment: MainAxisAlignment.center,
              children: [
                ElevatedButton(
                  onPressed: _isRunning ? _pauseTimer : _startTimer,
                  child: Text(_isRunning ? "Pause" : "Start"),
                ),
                const SizedBox(width: 20),
                ElevatedButton(
                  onPressed: _resetTimer,
                  style: ElevatedButton.styleFrom(primary: Colors.red),
                  child: const Text("Reset"),
                ),
              ],
            ),
          ],
        ),
      ),
    );
  }
}
Displaying Cooking Tips
A simple list of text widgets is sufficient for displaying cooking tips. We'll wrap this in a Column and Card for better presentation.
import 'package:flutter/material.dart';

class CookingTips extends StatelessWidget {
  final List<String> tips;

  const CookingTips({Key? key, required this.tips}) : super(key: key);

  @override
  Widget build(BuildContext context) {
    if (tips.isEmpty) {
      return const SizedBox.shrink(); // Don't show if no tips
    }
    return Card(
      margin: const EdgeInsets.all(8.0),
      child: Padding(
        padding: const EdgeInsets.all(16.0),
        child: Column(
          crossAxisAlignment: CrossAxisAlignment.start,
          children: [
            Text(
              "Cooking Tips:",
              style: Theme.of(context).textTheme.headline6,
            ),
            const SizedBox(height: 10),
            ...tips.map((tip) => Padding(
              padding: const EdgeInsets.only(bottom: 4.0),
              child: Text("• $tip"),
            )).toList(),
          ],
        ),
      ),
    );
  }
}
Assembling the Recipe Detail Widget
Now, let's combine all these components into a single RecipeDetailPage widget. This widget will typically be a Scaffold containing an AppBar and a ListView for scrollability.
import 'package:flutter/material.h';
// Assume all previous widgets (IngredientChecklist, CookingTimer, CookingTips)
// and data models (Recipe, Ingredient) are defined in the same file or imported.

class RecipeDetailPage extends StatelessWidget {
  final Recipe recipe;

  const RecipeDetailPage({Key? key, required this.recipe}) : super(key: key);

  @override
  Widget build(BuildContext context) {
    return Scaffold(
      appBar: AppBar(
        title: Text(recipe.title),
      ),
      body: ListView(
        children: [
          // Recipe Image
          Image.network(
            recipe.imageUrl,
            height: 250,
            width: double.infinity,
            fit: BoxFit.cover,
            errorBuilder: (context, error, stackTrace) {
              return Container(
                height: 250,
                color: Colors.grey[300],
                child: const Center(child: Text("Image not available")),
              );
            },
          ),
          Padding(
            padding: const EdgeInsets.all(16.0),
            child: Column(
              crossAxisAlignment: CrossAxisAlignment.start,
              children: [
                Text(
                  recipe.title,
                  style: Theme.of(context).textTheme.headline4,
                ),
                const SizedBox(height: 10),
                Text(
                  recipe.description,
                  style: Theme.of(context).textTheme.bodyText1,
                ),
                const SizedBox(height: 20),

                // Ingredient Checklist
                IngredientChecklist(ingredients: recipe.ingredients),
                const SizedBox(height: 20),

                // Instructions
                Padding(
                  padding: const EdgeInsets.all(8.0),
                  child: Text(
                    "Instructions:",
                    style: Theme.of(context).textTheme.headline6,
                  ),
                ),
                Card(
                  margin: const EdgeInsets.symmetric(horizontal: 8.0),
                  child: Padding(
                    padding: const EdgeInsets.all(16.0),
                    child: Text(
                      recipe.instructions,
                      style: Theme.of(context).textTheme.bodyText2,
                    ),
                  ),
                ),
                const SizedBox(height: 20),

                // Cooking Timer
                CookingTimer(initialDurationMinutes: recipe.cookingTimeMinutes),
                const SizedBox(height: 20),

                // Cooking Tips
                CookingTips(tips: recipe.tips),
              ],
            ),
          ),
        ],
      ),
    );
  }
}

// Minimal main.dart to run the example
void main() {
  runApp(MaterialApp(
    home: RecipeDetailPage(recipe: sampleRecipe),
  ));
}
State Management Considerations
For more complex applications, managing the state of ingredients and the timer might benefit from advanced state management solutions like Provider, BLoC, or Riverpod. For instance:
- Provider: A
ChangeNotifierProvidercould wrap the list of ingredients, allowing theIngredientChecklistto update and rebuild efficiently without needing aStatefulWidgetfor the entire list. - BLoC/Cubit: A BLoC could manage the timer's state (running, paused, duration) and dispatch events for user actions. Similarly, an ingredient BLoC could handle checking/unchecking.
For this example, we've used local setState within StatefulWidgets, which is perfectly adequate for simpler widgets or when the state changes are localized.
Conclusion
By breaking down the functionality into modular widgets and managing their states appropriately, we've successfully built a comprehensive and interactive recipe detail screen in Flutter. This approach enhances the user experience by providing a checklist for ingredients, a convenient timer for cooking, and easily accessible tips, making the recipe-following process much smoother and more enjoyable for the user.


