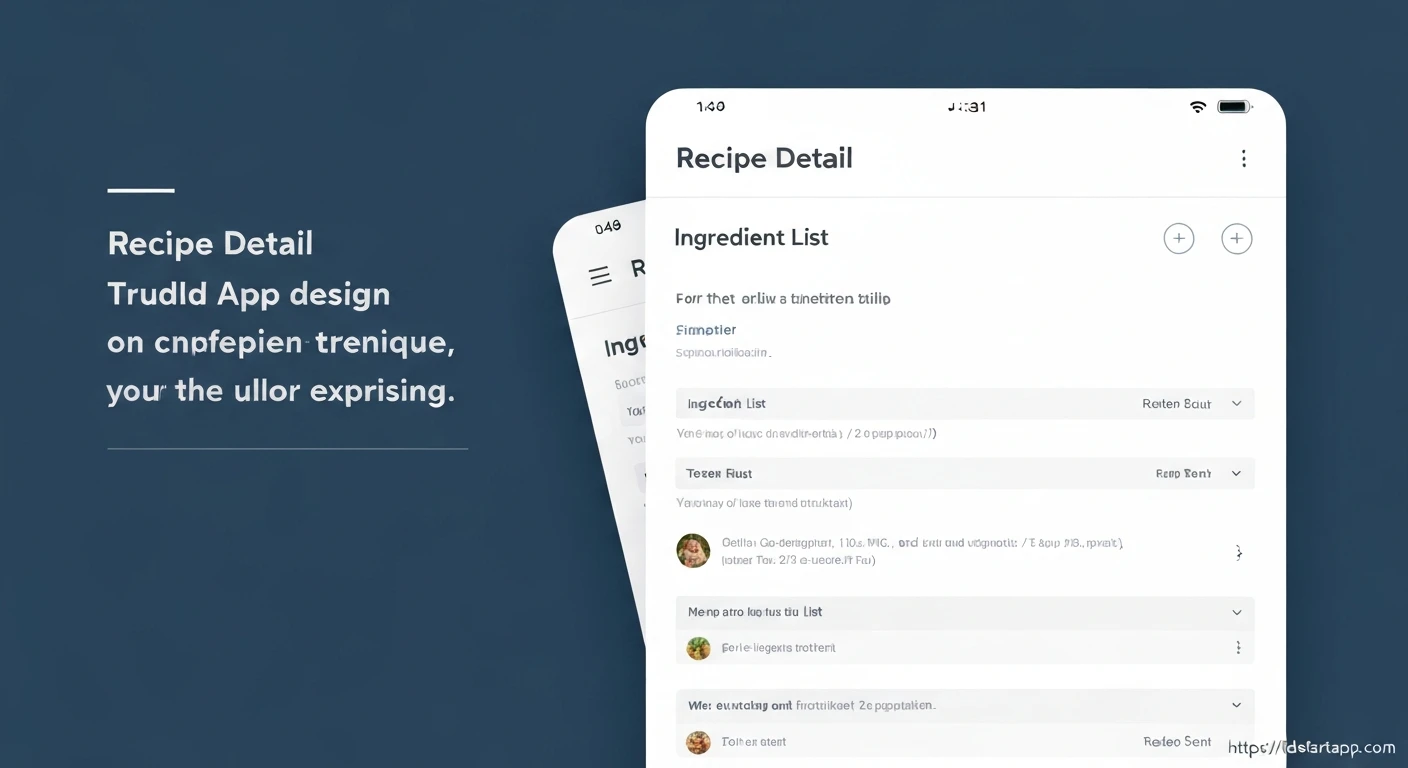

Building a Recipe Detail Page Widget with Ingredient List in Flutter
Creating a compelling user experience in a recipe application often hinges on a well-designed recipe detail page. This page serves as the central hub for users to explore all information about a specific dish, from its enticing image and description to the crucial list of ingredients and preparation steps. In Flutter, building such a page involves combining various widgets to present data clearly and intuitively.
This article will guide you through the process of constructing a professional recipe detail page widget in Flutter. We'll focus on displaying key recipe information and, specifically, implementing a dynamic ingredient list.
Understanding the Core Components
Before diving into the implementation, let's outline the essential components we'll need:
Recipe Data Model
First, we need to define data models for our Recipe and Ingredient. These models will structure the data we intend to display.
// lib/models/recipe_model.dart

class Ingredient {
  final String name;
  final String quantity;
  final String unit;

  Ingredient({required this.name, required this.quantity, required this.unit});
}

class Recipe {
  final String id;
  final String title;
  final String imageUrl;
  final String description;
  final int durationInMinutes;
  final List<Ingredient> ingredients;
  final List<String> steps;

  Recipe({
    required this.id,
    required this.title,
    required this.imageUrl,
    required this.description,
    required this.durationInMinutes,
    required this.ingredients,
    required this.steps,
  });
}
Widget Structure
Our recipe detail page will typically be a StatelessWidget that receives a Recipe object. It will likely use a SingleChildScrollView to ensure all content is scrollable, especially on smaller devices. Inside, a Column widget will arrange our header, description, and ingredient list vertically.
Step-by-Step Implementation
1. Defining the Recipe Detail Page Widget
Let's start by creating the basic structure of our RecipeDetailPage widget. It will take a Recipe object as input.
// lib/widgets/recipe_detail_page.dart

import 'package:flutter/material.dart';
import '../models/recipe_model.dart'; // Ensure this path is correct

class RecipeDetailPage extends StatelessWidget {
  final Recipe recipe;

  const RecipeDetailPage({Key? key, required this.recipe}) : super(key: key);

  @override
  Widget build(BuildContext context) {
    return Scaffold(
      appBar: AppBar(
        title: Text(recipe.title),
      ),
      body: SingleChildScrollView(
        child: Column(
          crossAxisAlignment: CrossAxisAlignment.start,
          children: [
            // Recipe Header (Image, Title, Duration) will go here
            // Recipe Description will go here
            // Ingredient List will go here
            // Preparation Steps will go here
          ],
        ),
      ),
    );
  }
}
2. Displaying Recipe Header
The header typically includes the recipe image, title, and other crucial information like cooking duration. We'll use a Container or SizedBox with an Image.network or Image.asset for the image, followed by Text widgets for details.
// Inside RecipeDetailPage's build method, replace comments with this:

// Recipe Header
Image.network(
  recipe.imageUrl,
  width: double.infinity,
  height: 250,
  fit: BoxFit.cover,
),
Padding(
  padding: const EdgeInsets.all(16.0),
  child: Column(
    crossAxisAlignment: CrossAxisAlignment.start,
    children: [
      Text(
        recipe.title,
        style: Theme.of(context).textTheme.headlineMedium?.copyWith(
          fontWeight: FontWeight.bold,
        ),
      ),
      const SizedBox(height: 8.0),
      Row(
        children: [
          const Icon(Icons.access_time, size: 18),
          const SizedBox(width: 4.0),
          Text('${recipe.durationInMinutes} mins',
            style: Theme.of(context).textTheme.bodyMedium,
          ),
        ],
      ),
      const SizedBox(height: 16.0),
      Text(
        recipe.description,
        style: Theme.of(context).textTheme.bodyLarge,
      ),
    ],
  ),
),
3. Implementing the Ingredient List
For the ingredient list, we'll create a dedicated widget called IngredientItem to display each ingredient cleanly. Then, we'll iterate through the recipe's ingredients and create an IngredientItem for each.
First, create the IngredientItem widget:
// lib/widgets/ingredient_item.dart

import 'package:flutter/material.dart';
import '../models/recipe_model.dart'; // Ensure this path is correct

class IngredientItem extends StatelessWidget {
  final Ingredient ingredient;

  const IngredientItem({Key? key, required this.ingredient}) : super(key: key);

  @override
  Widget build(BuildContext context) {
    return Padding(
      padding: const EdgeInsets.symmetric(vertical: 4.0),
      child: Row(
        crossAxisAlignment: CrossAxisAlignment.start,
        children: [
          const Icon(Icons.check_circle_outline, size: 20, color: Colors.green),
          const SizedBox(width: 8.0),
          Expanded(
            child: Text(
              '${ingredient.quantity} ${ingredient.unit} ${ingredient.name}',
              style: Theme.of(context).textTheme.bodyLarge,
            ),
          ),
        ],
      ),
    );
  }
}
Now, integrate this into the RecipeDetailPage. We'll add a heading for ingredients and then map our list of Ingredient objects to IngredientItem widgets.
// Inside RecipeDetailPage's build method, after the description:

// Ingredients Section
Padding(
  padding: const EdgeInsets.symmetric(horizontal: 16.0, vertical: 8.0),
  child: Text(
    'Ingredients',
    style: Theme.of(context).textTheme.headlineSmall?.copyWith(
      fontWeight: FontWeight.bold,
    ),
  ),
),
Padding(
  padding: const EdgeInsets.symmetric(horizontal: 16.0),
  child: Column(
    crossAxisAlignment: CrossAxisAlignment.start,
    children: recipe.ingredients
        .map((ingredient) => IngredientItem(ingredient: ingredient))
        .toList(),
  ),
),
4. Assembling the Full Page with Sample Data
Finally, let's put it all together and include some dummy data to see our page in action. You can include preparation steps similarly to ingredients.
// lib/widgets/recipe_detail_page.dart (complete code)

import 'package:flutter/material.dart';
import '../models/recipe_model.dart';
import 'ingredient_item.dart'; // Make sure this import path is correct

class RecipeDetailPage extends StatelessWidget {
  final Recipe recipe;

  const RecipeDetailPage({Key? key, required this.recipe}) : super(key: key);

  @override
  Widget build(BuildContext context) {
    return Scaffold(
      appBar: AppBar(
        title: Text(recipe.title),
      ),
      body: SingleChildScrollView(
        child: Column(
          crossAxisAlignment: CrossAxisAlignment.start,
          children: [
            // Recipe Header
            Image.network(
              recipe.imageUrl,
              width: double.infinity,
              height: 250,
              fit: BoxFit.cover,
            ),
            Padding(
              padding: const EdgeInsets.all(16.0),
              child: Column(
                crossAxisAlignment: CrossAxisAlignment.start,
                children: [
                  Text(
                    recipe.title,
                    style: Theme.of(context).textTheme.headlineMedium?.copyWith(
                      fontWeight: FontWeight.bold,
                    ),
                  ),
                  const SizedBox(height: 8.0),
                  Row(
                    children: [
                      const Icon(Icons.access_time, size: 18),
                      const SizedBox(width: 4.0),
                      Text('${recipe.durationInMinutes} mins',
                        style: Theme.of(context).textTheme.bodyMedium,
                      ),
                    ],
                  ),
                  const SizedBox(height: 16.0),
                  Text(
                    recipe.description,
                    style: Theme.of(context).textTheme.bodyLarge,
                  ),
                ],
              ),
            ),
            // Ingredients Section
            Padding(
              padding: const EdgeInsets.symmetric(horizontal: 16.0, vertical: 8.0),
              child: Text(
                'Ingredients',
                style: Theme.of(context).textTheme.headlineSmall?.copyWith(
                  fontWeight: FontWeight.bold,
                ),
              ),
            ),
            Padding(
              padding: const EdgeInsets.symmetric(horizontal: 16.0),
              child: Column(
                crossAxisAlignment: CrossAxisAlignment.start,
                children: recipe.ingredients
                    .map((ingredient) => IngredientItem(ingredient: ingredient))
                    .toList(),
              ),
            ),
            const SizedBox(height: 24.0),
            // Preparation Steps Section
            Padding(
              padding: const EdgeInsets.symmetric(horizontal: 16.0, vertical: 8.0),
              child: Text(
                'Preparation Steps',
                style: Theme.of(context).textTheme.headlineSmall?.copyWith(
                  fontWeight: FontWeight.bold,
                ),
              ),
            ),
            Padding(
              padding: const EdgeInsets.symmetric(horizontal: 16.0),
              child: Column(
                crossAxisAlignment: CrossAxisAlignment.start,
                children: recipe.steps.asMap().entries.map((entry) {
                  int index = entry.key;
                  String step = entry.value;
                  return Padding(
                    padding: const EdgeInsets.symmetric(vertical: 4.0),
                    child: Row(
                      crossAxisAlignment: CrossAxisAlignment.start,
                      children: [
                        Text('${index + 1}. ',
                          style: Theme.of(context).textTheme.bodyLarge?.copyWith(
                            fontWeight: FontWeight.bold,
                          ),
                        ),
                        Expanded(
                          child: Text(
                            step,
                            style: Theme.of(context).textTheme.bodyLarge,
                          ),
                        ),
                      ],
                    ),
                  );
                }).toList(),
              ),
            ),
            const SizedBox(height: 24.0),
          ],
        ),
      ),
    );
  }
}
To view this page, you would typically push it onto your navigator stack from another screen, passing a Recipe object:
// Example usage in main.dart or another screen:

import 'package:flutter/material.dart';
import 'lib/models/recipe_model.dart';
import 'lib/widgets/recipe_detail_page.dart';

void main() {
  runApp(const MyApp());
}

class MyApp extends StatelessWidget {
  const MyApp({Key? key}) : super(key: key);

  @override
  Widget build(BuildContext context) {
    // Sample Recipe Data
    final Recipe sampleRecipe = Recipe(
      id: 'r1',
      title: 'Spaghetti Carbonara',
      imageUrl: 'https://upload.wikimedia.org/wikipedia/commons/thumb/3/36/Spaghetti_Carbonara.jpg/1200px-Spaghetti_Carbonara.jpg',
      description: 'A classic Italian pasta dish from Rome, made with egg, hard cheese, cured pork (guanciale), and black pepper. Simple, yet incredibly rich and satisfying.',
      durationInMinutes: 25,
      ingredients: [
        Ingredient(name: 'Spaghetti', quantity: '200', unit: 'g'),
        Ingredient(name: 'Guanciale', quantity: '100', unit: 'g'),
        Ingredient(name: 'Egg Yolks', quantity: '2', unit: ''),
        Ingredient(name: 'Whole Egg', quantity: '1', unit: ''),
        Ingredient(name: 'Pecorino Romano', quantity: '50', unit: 'g'),
        Ingredient(name: 'Black Pepper', quantity: 'to taste', unit: ''),
      ],
      steps: [
        'Boil spaghetti in salted water according to package instructions.',
        'While pasta cooks, cut guanciale into small strips and fry in a pan until crispy.',
        'In a bowl, whisk egg yolks, whole egg, grated Pecorino Romano, and a generous amount of black pepper.',
        'Once spaghetti is al dente, drain it, reserving some pasta water.',
        'Add hot spaghetti to the pan with guanciale (off the heat).',
        'Quickly pour the egg mixture over the pasta, tossing vigorously to emulsify and create a creamy sauce. Add a splash of pasta water if needed to achieve desired consistency.',
        'Serve immediately, garnished with extra Pecorino Romano and black pepper.',
      ],
    );

    return MaterialApp(
      title: 'Recipe App',
      theme: ThemeData(
        primarySwatch: Colors.blue,
        visualDensity: VisualDensity.adaptivePlatformDensity,
      ),
      home: RecipeDetailPage(recipe: sampleRecipe), // Display our detail page
    );
  }
}
Enhancements and Best Practices
- Styling: Use Flutter's theming capabilities to maintain consistent typography and colors across your app.
- Responsiveness: Consider using
MediaQueryor packages likeresponsive_builderfor more complex layouts that adapt to different screen sizes. - Error Handling: Implement error handling for image loading (e.g., using a placeholder widget if an image fails to load).
- State Management: For more interactive recipe pages (e.g., ticking off ingredients, dynamic portion sizing), integrate a state management solution like Provider, Riverpod, or BLoC.
- Animations: Add subtle animations, like hero animations for images, to make the navigation between recipe lists and detail pages smoother and more engaging.
Conclusion
You have successfully built a foundational recipe detail page widget in Flutter, complete with a clear display of recipe information, a dynamic image, and a meticulously presented ingredient list. By leveraging Flutter's widget composition model and separating concerns into smaller, reusable widgets, you can create robust and maintainable UI components. This serves as an excellent starting point for any recipe application, offering a user-friendly and informative experience.


