
Creating an Animated Wave Background for Your Flutter Splash Screen
Splash screens serve as the initial impression of your mobile application, offering a momentary brand showcase and a seamless transition while content loads. A dynamic and visually appealing splash screen can significantly enhance user experience. This article delves into creating an elegant animated wave background for your Flutter splash screen, leveraging Flutter's robust animation capabilities and custom painting features.
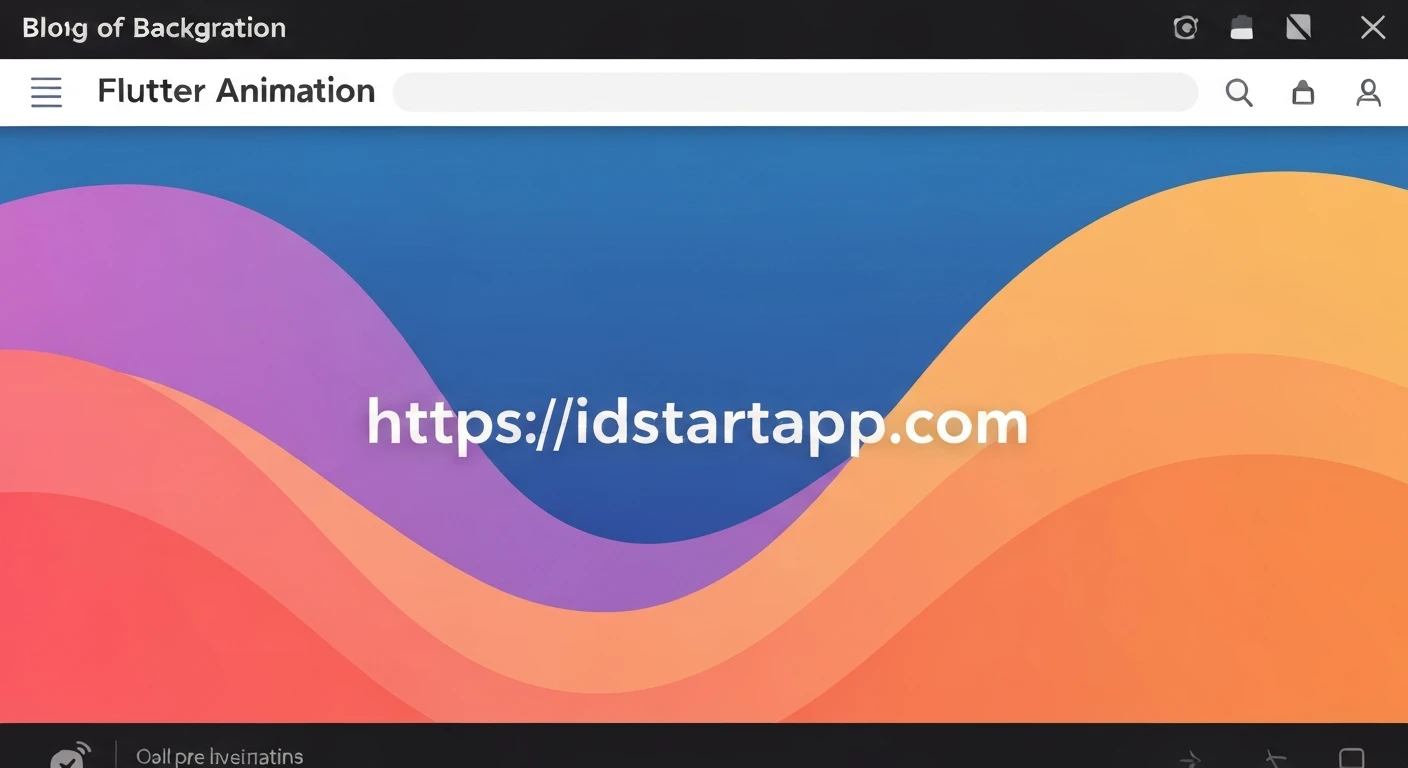
Why Animated Waves on a Splash Screen?
Static splash screens are functional, but animated ones elevate the user's initial interaction. Animated waves provide a sense of fluidity, dynamism, and modernity. They can be subtly branded with your app's color palette, creating a memorable and engaging start to the user journey. Flutter, with its declarative UI and performance-oriented rendering engine, is an ideal platform for implementing such intricate animations.
Core Concepts for Custom Wave Animation
To achieve a custom animated wave effect, we'll primarily use the following Flutter concepts:
CustomPainter: This widget allows you to draw custom shapes, paths, and graphics directly onto the canvas. It's perfect for creating the wave's unique curves.AnimationController: Manages the animation's lifecycle, including starting, stopping, and repeating. It drives the animation's progress from 0.0 to 1.0 over a specified duration.Tween: Defines a range of values that an animation can animate between. For our wave, this might involve animating a position or an offset.CurvedAnimation: Applies a non-linear curve to the animation's progress, allowing for more natural and aesthetically pleasing movements (e.g., ease-in-out).AnimatedBuilder: A performance-optimized widget that rebuilds only the parts of the widget tree that depend on an animation, preventing unnecessary rebuilds of the entire screen.
Step-by-Step Implementation
1. Define the Wave Painter (WavePainter)
First, we create a CustomPainter class responsible for drawing the wave. The wave will be drawn using Bézier curves to create smooth, undulating patterns.
import 'package:flutter/material.dart';

class WavePainter extends CustomPainter {
  final double animationValue; // Controls the wave's horizontal shift
  final List colors; // Colors for the gradient

  WavePainter(this.animationValue, {required this.colors});

  @override
  void paint(Canvas canvas, Size size) {
    final Path path = Path();
    final Paint paint = Paint()..style = PaintingStyle.fill;

    // Create a gradient for the wave
    paint.shader = LinearGradient(
      begin: Alignment.topCenter,
      end: Alignment.bottomCenter,
      colors: colors,
    ).createShader(Rect.fromLTWH(0, 0, size.width, size.height));

    // Define control points for the wave
    double y1 = size.height * 0.7; // Starting y position
    double y2 = size.height * 0.8; // Crest/Trough y position
    double y3 = size.height * 0.75; // Ending y position

    // Adjust control points based on animationValue for horizontal movement
    // The animationValue will typically range from 0.0 to 1.0,
    // and we can scale it to shift the wave across the screen.
    double xOffset = size.width * animationValue;

    path.moveTo(0, y1);
    path.quadraticBezierTo(
      size.width * 0.25 - xOffset, y2, // Control point 1
      size.width * 0.5 - xOffset, y3, // End point 1
    );
    path.quadraticBezierTo(
      size.width * 0.75 - xOffset, size.height * 0.6, // Control point 2
      size.width - xOffset, size.height * 0.7, // End point 2
    );

    // Complete the path to form a closed shape (the bottom part of the wave)
    path.lineTo(size.width, size.height);
    path.lineTo(0, size.height);
    path.close();

    canvas.drawPath(path, paint);
  }

  @override
  bool shouldRepaint(covariant WavePainter oldDelegate) {
    // Only repaint if the animation value or colors change
    return oldDelegate.animationValue != animationValue || oldDelegate.colors != colors;
  }
}
In this painter, animationValue will be a value from 0.0 to 1.0 (or beyond for continuous animation) that shifts the wave horizontally, creating the illusion of movement. We use quadraticBezierTo to draw smooth curves.
2. Create the Splash Screen Widget (SplashScreen)
Next, we create a stateful widget for our splash screen. This widget will manage the AnimationController and combine the WavePainter with other splash screen elements.
import 'package:flutter/material.dart';
// Assuming WavePainter is in 'wave_painter.dart' (or same file for simplicity)
// import 'wave_painter.dart';

class SplashScreen extends StatefulWidget {
  const SplashScreen({super.key});

  @override
  State createState() => _SplashScreenState();
}

class _SplashScreenState extends State with SingleTickerProviderStateMixin {
  late AnimationController _animationController;
  late Animation _animation;

  @override
  void initState() {
    super.initState();
    _animationController = AnimationController(
      vsync: this,
      duration: const Duration(seconds: 3), // Duration for one full wave cycle
    )..repeat(); // Makes the animation loop continuously

    _animation = Tween(begin: 0.0, end: 1.0).animate(
      CurvedAnimation(
        parent: _animationController,
        curve: Curves.easeInOut, // Smooth acceleration and deceleration
      ),
    );

    // Navigate to home after a fixed delay (e.g., 5 seconds)
    Future.delayed(const Duration(seconds: 5), () {
      if (mounted) {
        Navigator.of(context).pushReplacement(
          MaterialPageRoute(builder: (_) => const HomeScreen()), // Replace with your home screen
        );
      }
    });
  }

  @override
  void dispose() {
    _animationController.dispose();
    super.dispose();
  }

  @override
  Widget build(BuildContext context) {
    return Scaffold(
      backgroundColor: Colors.blue.shade900, // Background color behind the wave
      body: Stack(
        children: [
          // Animated Wave Background
          AnimatedBuilder(
            animation: _animation,
            builder: (context, child) {
              return CustomPaint(
                painter: WavePainter(
                  _animation.value, // Pass the current animation value to the painter
                  colors: [Colors.blue.shade700, Colors.blue.shade400], // Wave gradient colors
                ),
                child: Container(), // Empty container to occupy space
              );
            },
          ),
          // App Logo and Name
          Center(
            child: Column(
              mainAxisAlignment: MainAxisAlignment.center,
              children: [
                // Replace with your actual logo
                const FlutterLogo(size: 100),
                const SizedBox(height: 20),
                Text(
                  'Your App Name',
                  style: TextStyle(
                    color: Colors.white,
                    fontSize: 32,
                    fontWeight: FontWeight.bold,
                  ),
                ),
              ],
            ),
          ),
        ],
      ),
    );
  }
}

// Dummy Home Screen for navigation example
class HomeScreen extends StatelessWidget {
  const HomeScreen({super.key});

  @override
  Widget build(BuildContext context) {
    return Scaffold(
      appBar: AppBar(title: const Text('Home Screen')),
      body: const Center(
        child: Text('Welcome to the Home Screen!'),
      ),
    );
  }
}
In the SplashScreen widget:
SingleTickerProviderStateMixinis used to provide a ticker for theAnimationController._animationController.repeat()ensures the wave animation loops indefinitely until the splash screen is dismissed.AnimatedBuilderlistens to the animation and rebuilds theCustomPaintwidget efficiently, passing the current_animation.valueto theWavePainter.- A
Stackwidget allows layering the animated wave background beneath your app's logo and text.
Enhancements and Customization
The basic setup provides a single animated wave. You can expand upon this to create more complex and visually rich effects:
- Multiple Waves: Create several
CustomPaintwidgets, each with aWavePainterinstance. Assign slightly differentanimationValueoffsets, durations, and color gradients to each. Place them in aStackto layer them, giving a sense of depth and continuous motion. - Color Variations: Experiment with different color palettes that match your brand. Using transparent colors for overlapping waves can create a stunning visual effect.
- Dynamic Wave Shapes: Modify the control points of your Bézier curves within the
WavePainteror animate them to make the waves change shape as they move. - Background Image/Video: Instead of a solid background color, you could place an image or a subtle background video behind the waves in the
Stack.
// Example for multiple waves (concept, requires possibly adjusting WavePainter logic
// or creating distinct WavePainters for different wave behaviors)
Stack(
  children: [
    // Back wave, slightly slower, different colors, lower opacity
    AnimatedBuilder(
      animation: _animationController,
      builder: (context, child) {
        return CustomPaint(
          painter: WavePainter(
            (_animationController.value * 0.7) + 0.5, // Slower speed, initial offset
            colors: [Colors.cyan.shade900.withOpacity(0.5), Colors.cyan.shade700.withOpacity(0.5)],
          ),
          child: Container(),
        );
      },
    ),
    // Front wave, faster, primary colors
    AnimatedBuilder(
      animation: _animationController,
      builder: (context, child) {
        return CustomPaint(
          painter: WavePainter(
            _animationController.value, // Normal speed
            colors: [Colors.blue.shade700, Colors.blue.shade400],
          ),
          child: Container(),
        );
      },
    ),
    // ... other splash screen elements (logo, text)
  ],
)
Conclusion
Implementing an animated wave background for your Flutter splash screen is an effective way to enhance your application's aesthetic appeal and user engagement right from the start. By combining CustomPainter for drawing complex shapes and AnimationController with AnimatedBuilder for efficient animation, Flutter empowers developers to create highly customized and fluid user interfaces. This technique not only makes your splash screen visually captivating but also reinforces your brand identity with a touch of modern design.


